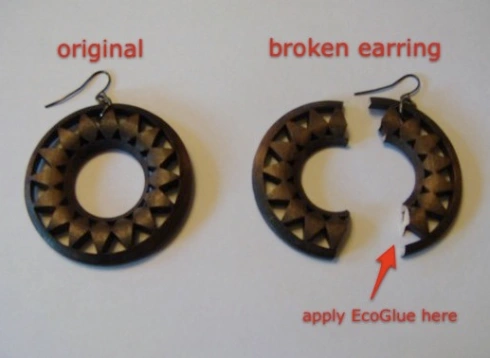
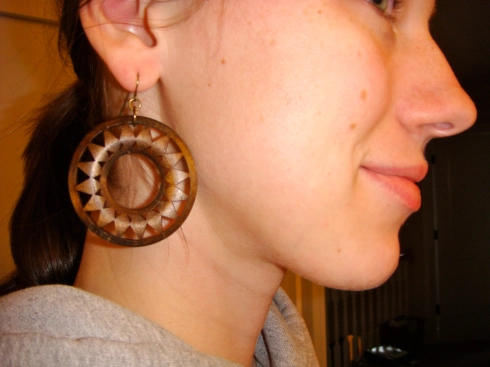
I don’t own a lot of jewelry, but the few pieces that I do have I tend to wear a lot.  When this pair of wooden earrings broke recently, I was upset.

I was about to throw them away, but thought that I should at least try to fix them first.  I chose to use EcoGlue because it is water-based and adheres to wood.

First, I applied the EcoGlue along one of the broken edges.  Then, I matched up the two pieces and held for about 30 seconds.  I let the earring sit overnight and it was as good as new!

Next time you think about throwing out a pair of broken earrings, try repairing them first!

Gary and Monika Westcott travel the world researching and exploring and Shoe GOO has been a lifesaver (or more accurately, tire saver) twice!  We chatted with Gary about why he’s a Shoe GOO fan and how he uses it.

Turtle V isn’t just any SUV, what do you use the Turtle V vehicle for?

The Turtle V is an experimental prototype of the Turtle Expedition research trucks, used to travel and explore the world. Replacing four previous travel/research vehicles, The Turtle V and its European-style Tortuga Expedition Camper is the latest home on the road. Based on a Super Duty F-550, it is carefully outfitted with equipment of proven quality and reliability.

What happened to the tire and how did you use Shoe GOO to repair it?

There were two occasions. Once, while exploring backroads in Canada’s Northwest Territories, one of our BFGoodrich Mud Terrains tires suffered a severe rock cut in the face of the tread. We cleaned the cut thoroughly, filled the cut with black Shoe GOO, and drove the tire onto a flat board covered with plastic. In the morning, the tire was ready to roll. It was not a permanent repair, but it kept dirt and gravel from working its way into the tire and to the core. The plastic was gone in a few miles. The Shoe GOO lasted until we got home.

Most recently, we caught a sharp piece of metal on the side of the rear tire the day before we headed to SEMA where the truck was part of the Specialty Vehicle Exhibit. It was an ugly gash about 7 inches long on the side wall. We drove to Las Vegas, filled the gash with Shoe GOO, (all we had was clear), and placed wax paper and tape over the area. In the morning, the wax paper and tape were removed, showing a much improved damaged area. A black felt pen added some color to the clear Shoe GOO. We expect it will look even better when we get the black Shoe GOO. This is a $535.00 tire, so we don’t throw it out because of a cosmetic problem.

How is Shoe GOO different from other repair adhesives you’ve tried?

We have not tried other silicon products to repair tires. Shoe GOO just seems to be tough enough that it’s worth a try in an emergency.

Do you use Shoe GOO for anything else?

All the normal things: Birkenstocks shoe soles, hiking boots, running shoes, cracks in the rubber bottom of bath mats, etc.

To learn more about Gary and Monika Westcott’s expeditions, visit www.TurtleExpedition.com.

Note: This story is Gary & Monika’s personal experience. We love this story, but we always recommend hiring a professional to make tire repairs.

There are only a few days left until Christmas, and chances are you’ve still got some shopping to do. To help you out, we’ve put together a list of our favorite picks for crafting.  From scissors and glue to storage bins and paper these gifts are great for all ages!

This Elenco Discovery Planet Rock Tumbler is perfect for someone interested in making jewelry.  The kit from Target includes gemstones, earring wires, a necklace and more.

Stampin’ Up! has great supplies for all kinds of crafts.  This Circle Card Kit includes an exclusive Stampin’ Up! double-mounted stamp, a Classic Stampin’ Spot, and papers and embellishments that are perfect together.

Whether for card making, scrapbooking or wrapping this assortment of Paper Shaper scissors adds a little fun to any project.

This Simple Circle Cutter from Martha Stewart is a must have.  It cuts perfect circles from 1 inch to 5.5 inches in diameter in 1/16 increments. Amazing!

Amazing E-6000 Craft bonds to glass, wood, plastics, tin, metal, ceramic, cement, rubber, vinyl, leather, fabric and many more.

We just love the storage bins from Cropper Hopper.  The various compartments are perfect for storing cards, paper, scissors, glue, ribbon and more.

If you’re still trying to decide what to get your sister or friend for the holidays, why not try making something?  This craft is super easy, looks adorable and less than $10!

Materials:

  • Metal headband
  • Feathers (I got mine from Michael’s already on the piece of fabric)
  • Black ribbon
  • Amazing GOOP Craft Adhesive

Step 1:

Measure the black ribbon so that it fits the length of the fabric on the backside of the feathers.

Step 2:

Next, put Amazing GOOP Craft Glue along the edges of the ribbon (vertically so you have a gap in the middle) and place down on the fabric.  Let it sit for about 10 min or until dry.

Step 3:

Slide the metal headband through the middle section of the fabric and you’re all done!

Unique, beautiful and custom! What could be a better Christmas gift? By the way, it takes about 24 hours for a full cure of the adhesive, so don’t stick it on your head til then.

image courtesy of istockphoto

Do you have a favorite craft or DIY project that includes one of our products?  Or, have an idea that you’ve been wanting to try? Share it with us and you could be featured on this blog!

Throughout the month of December we’ll be accepting project submissions. At the end of the month we’ll choose one or more of our favorites to feature.  We want to see what unique and fun projects you come up with using Amazing GOOP, Eco Glue or other Eclectic Products. So, get out your glue, scissors, paint, paper, fabric and show us you’ve got!

Just a few things to keep in mind.  The craft or DIY project submitted must include an Eclectic Product and must include an image(s) and/or video with a how-to description of your project. Those featured will get a gift basket of glue to suit your DIY or crafting needs.

Send submissions to kelli.matthews[at]gmail.com

You can peek at some of our previous guest posts and contest winners to get inspiration:

RC cars and Amazing GOOP

ShoeGOO Decoupage(ish) Shoes

Baby Name Art Canvas How-To

Mosaic Mushroom How-To

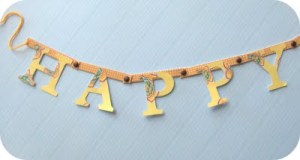
This craft is great to do with your kids and a fun way to personalize decorations for any occasion.  Depending on the size of letters you choose to use, you could hang it on a wall, in a doorway or even on your fridge.  We see this banner most commonly used for Happy Birthday, but with the holidays coming up I think it’d be fun to try Happy Halloween, Happy Thanksgiving, Merry Christmas or Happy Hanukkah.
Banner 1

Image courtesy of Zakka Life

Supplies you will need

Letters- You can get these from the craft store in the scrapbooking section, or cut them out of a decorative paper you like. If you want a smaller banner, I would recommend using letters about 1 ½ inches high and if you want a larger banner 4 inches is a good size.

Rectangles- The size of the rectangles will depend on the size of your letters.  They need to be big enough to attach to the top of the letter with about a ½ inch of extra space on each end.  A heavy stock paper works best for these pieces.

Extra small brads

Small hole punch

String

E6000 glue

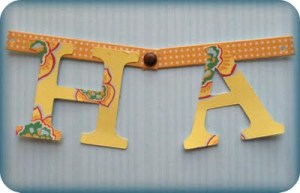
Once you have all of your letters and rectangles, lay them out to make sure everything looks the way you want.  Then, glue the top part of each letter to the rectangles.  Once the glue has dried, punch a hole on each side.

Banner 2

Image courtesy of Zakka Life

Overlap the holes of the two rectangles and secure with a brad.  Continue until you’ve spelled out the entire phrase.  Use the end holes to tie with string and the banner is ready to hang.

Once again, Eclectic Product users continue to blow us away. YouTube user Battlebots16 provided us with some insight on how he builds RC cars using sheet metal and Amazing GOOP. Check out his video below and learn how he uses Amazing GOOP to produce some killer creations.

What inspired you start making RC cars, boats, robots, etc?

I’ve always been building things as far as I can remember. However, I didn’t have a good glue to use until 1999.  My dad bought me a tube of Amazing GOOP that year. The glue worked so well that I haven’t used anything since. Nothing else works right.

Would you recommend this hobby to everyone? Why or why not?

I would recommend this hobby to anyone that enjoys making things with their hands. I get the sheet metal for my projects out of trash bins at the housing projects, so in a way I’m recycling. I’m making garbage into fun projects.

What supplies did you use to create the battlebots/RC cars?

I make battlebots out of sheet metal and steel. The bots are driven by power wheels, motors being flipped on and off by switches. The switches make it possible for the robot to move forward and reverse. Amazing GOOP is used to hold many of the key components in place and make repairs. The RC cars are made from sheet metal and other parts. The frames are strap steel or old box fan frame rails.

Why do you think Amazing GOOP was a good fit for this project?

I tried every glue available: hot glue, super glue, epoxy, J-B Weld, Gorilla Glue–you name it! All the other products let me down. When I got my first tube of GOOP, I was hooked. Not only is it strong, it does not fail, as you can see in my YouTube video of the RC Delorean. The video shows the sheet metal trashed from the impact, yet all the places where it’s glued did not budge. (I have actually ripped sheet metal by trying to pull a GOOPed seam apart). I recommend this glue to everyone I know.

Do you use Amazing GOOP for other uses?

I have used Amazing GOOP on just about anything you can think of.  For example, I reattached a knob onto the stove that kept falling off, I use it for everything. If something breaks, I reach for Amazing GOOP.

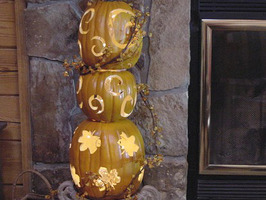
Pumpkin Topiary from DIY Network

Pumpkin Topiary from DIY Network

With the arrival of fall come some of my favorite things: warm cider, carmel apples and pumpkins!  Here is a list of a few things you can do with pumpkins.

Carving.  Halloween is just 4 weeks away and that’s just enough time to get what you need to carve the perfect pumpkin.  HGTV has great tips for carving.  And, if you’re like me and have a hard time figuring out what to carve, try templates.  They’re easy to use and you’re bound to have the best looking pumpkin on the block!

Pumpkin Pie.  This is an absolute must have.  I don’t care if it’s store bought or home made, pumpkin pie is the best.   Here’s a great recipe from Martha Stewart.

Pumpkin Seeds.  I absolutely love, love, love oven roasted pumpkin seeds!  Of course you can buy them from the store, but they are much tastier warm and fresh out of the oven.  Lightly salted, they are a perfect fall snack.

Decorative Topiary. The DIY network suggests creating a decorative topiary with carved pumpkins. Once carved, stack the pumpkins, glue them together so they stay put, and wrap twinkle lights around the outside to complete the look.  This clever project would be perfect next to a fireplace or entry way. Try E6000 or EcoGlue Extreme.

Do you have any favorite fall traditions?

Whether we’d like to admit it or not, summer is on its way out and fall has arrived.  It’s time to take the fun with family and friends from the backyard patio indoors.  Of course you can find the same old decorations in stores, but why not try something different this year? We’ve found some great ways you can update a room for fall in just a few easy steps!

Decorative Light-Switch Cover
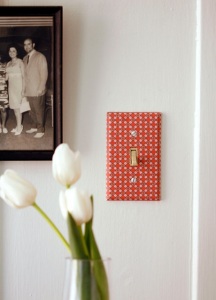
Image courtesy of Design Sponge

Image courtesy of Design Sponge

I did this years ago using tissue paper, but really you could use paper or fabric.  This is a fun and easy way to add interesting color to a otherwise plain wall.  All you need is your choice of fabric, E6000 Craft and an x-acto knife.

First remove the light switch cover from the wall, the cut a piece of fabric slightly bigger than the size of the cover.  You’ll want to be able to fold some extra fabric around the edges.  Make cutouts for the switch and screw holes.  Apply E6000 Craft onto the plastic light-switch cover, then put fabric in place.  Once the glue is dry, you’re ready to put your new and improved light-switch cover back on the wall!

Your local craft store will have a large selection of fabrics to choose from, but Ikea and Marimekko are also great places to look for unique patterns.

Image courtesy of Design Sponge

Image courtesy of Design Sponge

Upholstered Headboard

This project will take a little more time, but as you can see looks absolutely amazing when complete.  The combination of flowers and animals in this red and white print stands out so well on the neutral wall.

You’ll need the following items for this project: wood for your headboard, foam, batting, fabric, knife, scissors, staple gun, flush mount and E6000 Craft .

For full step-by-step instructions by Design Sponge go here.

Fun with Wall Paper

This is one of my favorite DIY projects because it can work in just about any room in your house.

Image courtesy of NOTCOT

Image courtesy of NOTCOT

It can be a great accent to your kitchen in a breakfast nook, add some flare to a bedroom or spice up your living room.

Craft stores, art stores or specialty gift shops are great places to find paper perfect to create this look.  The paper will most likely be just the right width when purchased, so no need to cut and worry about uneven lines.  Just be sure to measure the length of the wall you intend to use and purchase that length of paper.

Apply E6000 Craft to the wall, starting at the top.  Place the paper over the glued area and run your hand down as you flatten the paper, removing any air bubbles. Do this in small sections as you work down the wall.  Once you reach the floor and the end of the paper, you’re all done!  If you need to cut off excess paper at the end, I would recommend using an x-acto knife and ruler to ensure a nice straight line.

Some small, but simple changes can make indoor get-togethers even more delightful.

Enjoy!

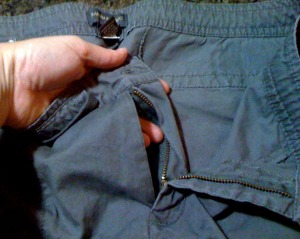
A couple of years ago on a business trip on the other side of the country, I picked up a pair of pants on clearance at Banana Republic for less than $10. It wasn’t until several days later and when I had returned home that I realized the zipper placket was completely unstitched. The pants were inexpensive enough that I wasn’t motivated to return them and I also knew it was an easy fix. And I always had it in my mind that I would do so (despite my lack of sewing machine).

pants_busted

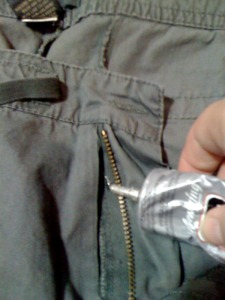
After a recent move, I was resolute to keep what was useful and donate what was not. So, armed with a tube of E6000, I determined to fix my pants. The pants were clean & dry. This part of my pants is not visible once this particular repair is done, but if you were to use this same technique to fix a hem, for example, you’d want to be more careful about potential permanent wrinkles.

pants_gluing

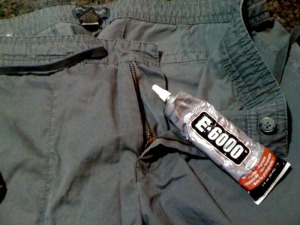
I followed the directions on the tube and then left them on the counter so the glue could cure overnight.

pants_e6000

The repair was invisible, pants washed just fine, placket intact. E6000 creates a permanent bond that will hold through washes, ironing and every day wear.

Pants_fixed

Get your own tube for repairs of all kinds, including zipper plackets, at ExcelBuyOnline or your local retailer.

Featured Product

Categories